The Print Preview toolbar provides tools for reviewing and adjusting documents before printing or exporting them. Options include viewing page thumbnails, searching the document, applying print settings, saving or opening preview files, printing or quick‑printing, changing page setup, adjusting headers and footers, zooming, navigating pages, previewing multiple pages at once, adding background color or a watermark, and exporting to formats such as PDF or XLSX.

- (1) Thumbnails: View thumbnails of each page
- (2) Search: Search the current document
- (3) Customize: Apply various print settings
- (4) Open: Open previously saved Preview Document Files (.prnx)
- (5) Save: Save the current document as a .prnx file
- (6) Print: Opens the print form with various options
- (7) Quick Print: Prints the document using the default settings
- (8) Page Setup: Change the paper size, orientation, and margins
- (9) Header/Footer: Add or change various options shown in the document Header and/or Footer
- (10) Scale: Change the scale of the page
- (11) Hand Tool: Enables you to scroll content by dragging the document instead of using scrollbars
- (12) Magnifier: Switch between 100% and "fit whole page" views. Simply click anywhere in the document, to toggle views
-
(13) Zoom: To zoom in a document, click the Zoom In button on the toolbar, or using your keyboard, press
 +
+  . To zoom out of a document, click the Zoom Out button on the toolbar, or using your keyboard, press +
  . To zoom in or out of a document, you can also hold down and rotate the mouse wheel.
 - (14) Navigation: To navigate between pages, use the scrollbars or navigation buttons on the toolbar. These buttons allow you to switch to the first, previous, next, or last page of a document
-
(15) Multiple Pages: To preview two or more pages at one time, click the Multiple Pages button on the toolbar. Then, hover over the page icons, depending on the required number of pages to preview

When the required number of pages has been selected, click the popup window to close it and apply changes to the document view -
(16) Color: To add a background color to a document, click the Background Color button on the toolbar, or click Color... on the Background menu

Then, choose a color from the Custom, Web, or System palettes - (17) Watermark: To add a text or image watermark to a document, click the Watermark button on the toolbar, or click Watermark... on the Background menu
-
(18) Export File: To export a document and save the resulting file on your hard drive, on the preview toolbar, either click the arrow near the Export Document... button, or from the File menu in the preview window, choose the Export Document... item.
- Choose a format from the list:
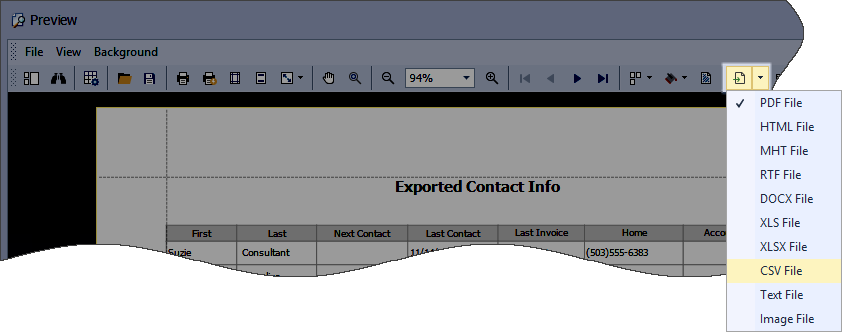
- Then, you may be prompted to define format-specific options. See corresponding help topics in this documentation for details, e.g. PDF-Specific Export Options.
- Once you've specified exporting options, the Save As dialog appears, allowing you to enter the file name.
Then, the following message will be invoked: - Click Yes, if you want to preview the exported file.
- Choose a format from the list:
-
(19) Export to Email: To send the resulting PDF file via e-mail, on the preview toolbar, either click the arrow near the Send via E-Mail... button, or from the File menu in the preview window, choose the Send via E-Mail... item
- Choose a format from the list:

- Then, you may be prompted to define format-specific options. See corresponding help topics in this documentation for details, e.g. PDF-Specific Export Options. Once you've specified exporting options, the Save As dialog appears, allowing you to enter the file name. Finally, the created document will be attached to a new empty message, created in your default mail program.
- Choose a format from the list:
- (20) Close: Closes the preview form