The Trip Log lets you track business mileage by entering the date, odometer readings, destinations, and the reason for each trip. You can also choose the vehicle used and enter a per‑mile rate so Boulevard can calculate your mileage deduction for a selected date range. Trips can be saved as memorized entries for future use, and the log can be printed or exported after filtering by date and vehicle.
Options:
Rename or Delete a Memorized Trip
Edit Vehicles, Destinations, or Reason for the Trip
From the Business Tools menu, select Trip Log.

Create a New Entry
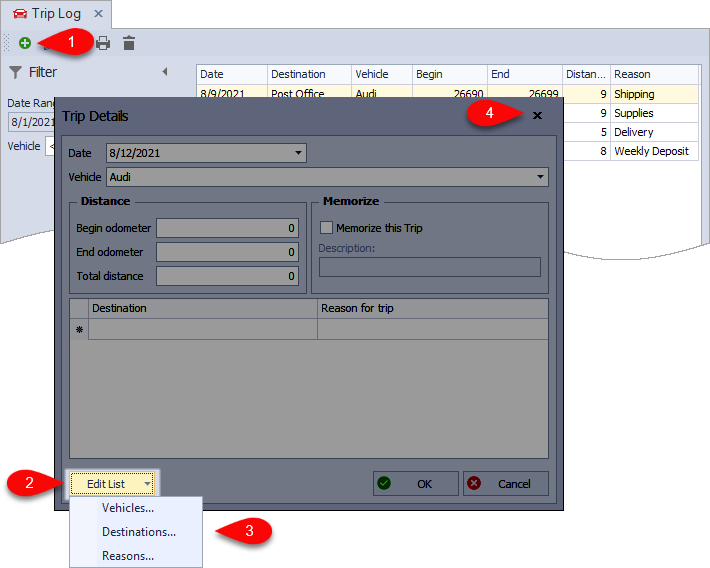
- From the trip log toolbar, click the add button
 to create a new entry, or if using a previously saved trip, double-click the desired trip from the Memorized section in the sidebar.
 - Add the vehicle if it is the first time being added or choose a previously used vehicle from the drop-down list.
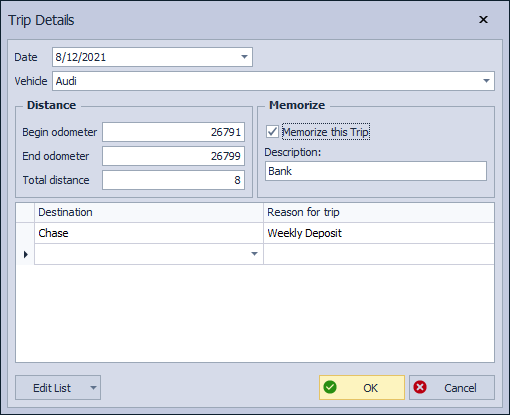
- Enter the Date and Begin odometer and End odometer reading.
- In the grid area of the Trip Details form, for each segment of the trip, add the Destination and Reason for trip.
- If this is a new trip that you would like to memorize for future use, before saving the form, from the Memorize section, select the Memorize this Trip checkbox, then in the Description field, enter a name for this trip. Otherwise, click OK to save and close the form.
Rename or Delete a Memorized Trip
Memorized trips cannot be edited. Instead, delete the trip and create a new entry. Then, select Memorize this Trip.
From the lower-left corner of the Trip Log, click Memorized.
Rename: Right-click on the memorized trip, then select Rename. When finished, click OK.
Delete: Right-click on it and select Delete. Click Yes to confirm.

Edit Vehicles, Destinations, or Reason for the Trip
- Click to create a new entry.
- From the lower left-hand corner of the form, click Edit List, then choose either Vehicles, Destinations, or Reasons.
- When finished making changes, click OK to save and close the Memorized List form.
- To close the Trip Details form without adding a new entry, click the X.
Print the Trip Log
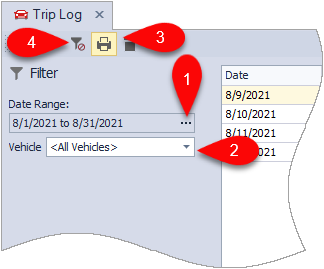
- From the Filter sidebar, in the Date Range field, click ... and select a pre-defined range or choose Custom... to enter a custom range.
- Choose a vehicle from the Vehicle drop-down list (or leave the default <All Vehicles> selected).
- From the toolbar, click the print button
 , then from the preview window, click
  to print (or
  to export as a pdf).
 - After printing, from the toolbar, click
 to clear any filters you have set.

Additional Information:
- If you are using multiple vehicles, set one as the default by clicking the settings button
 located in the lower left corner of the Trip Log. Then, select your desired vehicle from the options provided.