Information from Boulevard can be exported in several file formats, including CSV, by either using the quick export options or creating a customized view. Quick exports allow you to save email, phone, or address data based on the list and filters you choose, while customized exports let you build a tailored view with selected fields before exporting through the Print Preview window.
The steps below provide a general guide for using the customer list and a few fields to export in a CSV file (comma-separated value).
Options:
Preconfigured Quick Format (CSV File)
Customizable Layout (Multiple File Format Options)
Preconfigured Quick Format (CSV File)
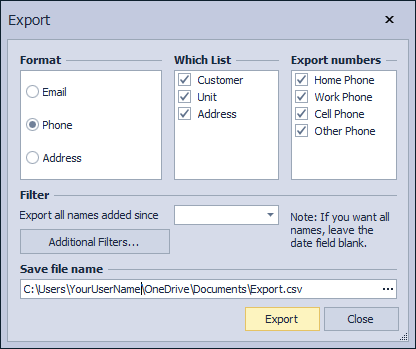
- From the File menu, select Export.
- Under the Format section, select either Email, Phone, or Address for the type of data you'd like to export.
- Under the Which List section, select the lists you'd like to include (if you select Phone, also select the phone numbers under the Export numbers section).
- If desired, enter a date under the Filter section to export only contacts added since a specific date. Use the Additional Filters button for advanced filtering (such as only contacts from a specific city, etc.).
- Under the Save file name section, click ... to change the default location where the file will be saved, then click Export.
- When finished, click OK, then Close.
Information Included with each format:
- Email: Email 1
- Phone: Option to include Home Phone, Work Phone, Cell Phone, and Other Phone
- Address: Name (includes First & Last Name), Street 1, Street 2, City, State/Province, Zip/Postal Code, Email 1, and Home Phone
Customizable Layout (Multiple File Format Options)
Step : Create a View
- From the toolbar of the list that you're working with, select
 View Options, then
  New from the drop-down options listed.
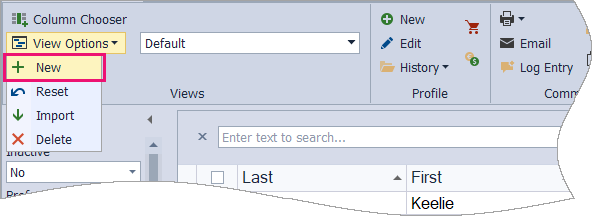
- In the Name field, give the view a name such as Exported Contact Info (we recommend that you create a view based on the Default layout).
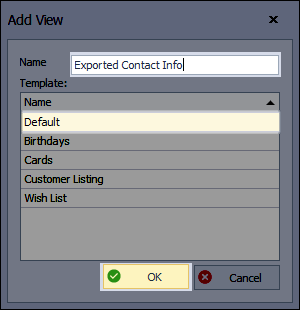
- From the Template section, ensure that Default is selected, then click OK to save.
Step : Customize the View
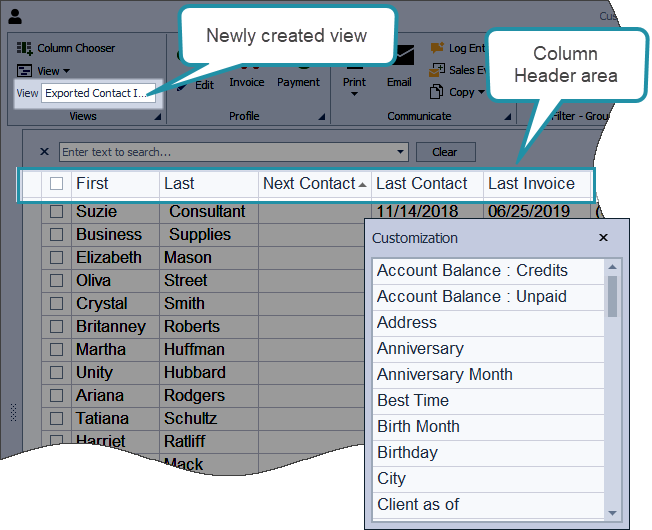
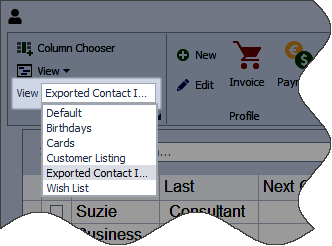
From the list toolbar, you should now see Exported Contact Info in the drop-down next to View Options. Currently, this view appears exactly the same as the Default view. Now, you'll want to customize the Exported Contact Info view by hiding columns you don't want to include, and adding columns that you do want to be included in the export.
- Right-click any column header you want to remove, then select Hide This Column.
- To add fields, from the toolbar, click
 Column Chooser.
 - From the Customization form that pops up in the lower right-hand corner, either double-click or drag and drop each field onto the column header area at the top of the list.
Step : Preview & Export a View
-
From the toolbar, select
 Print, then choose View.
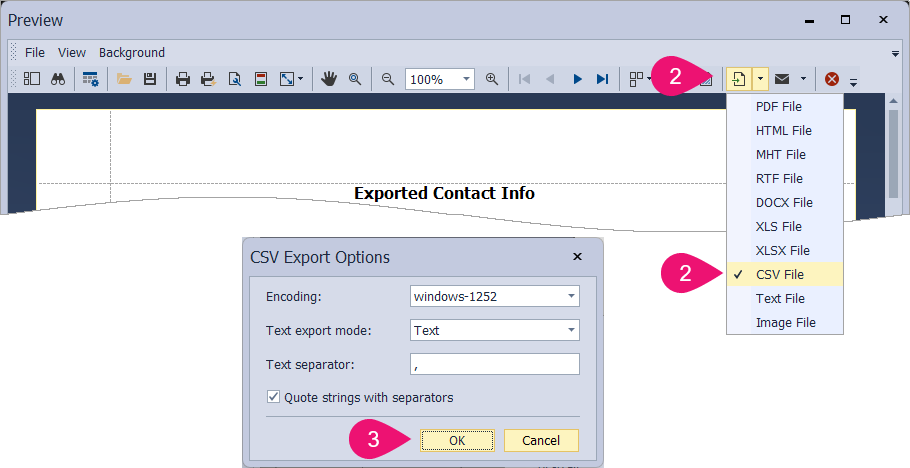
- From the preview window toolbar, select
 and choose CSV File (or the file format you want to export it as, or select
  to print).
 -
Select any additional options from the pop-up displayed for the file format chosen, then click OK.
- Give the file a name and navigate to the desired location to save it, then click Save .
Step : Delete a View
You can access this view in the future from the drop-down located on the contact list toolbar. However, if the view is no longer needed, it can be deleted following the steps outlined below.
-
Select the view to be deleted from the view drop-down.
-
From the toolbar, click
View Options, then select Delete from the drop-down options listed.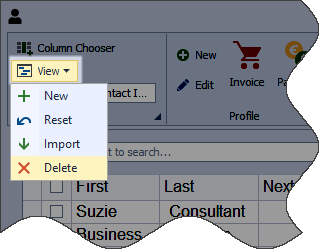
- Click Yes to confirm.