Working with a List in the List Builder
After saving a group of contacts as a list in the List Builder, you can print a custom report or mailing labels, send a group email, or create a Contact Log entry.
From the main toolbar, select  Contacts, then
  Builder (or from the Contacts menu, select
  List Builder).
Options:
Print a Report
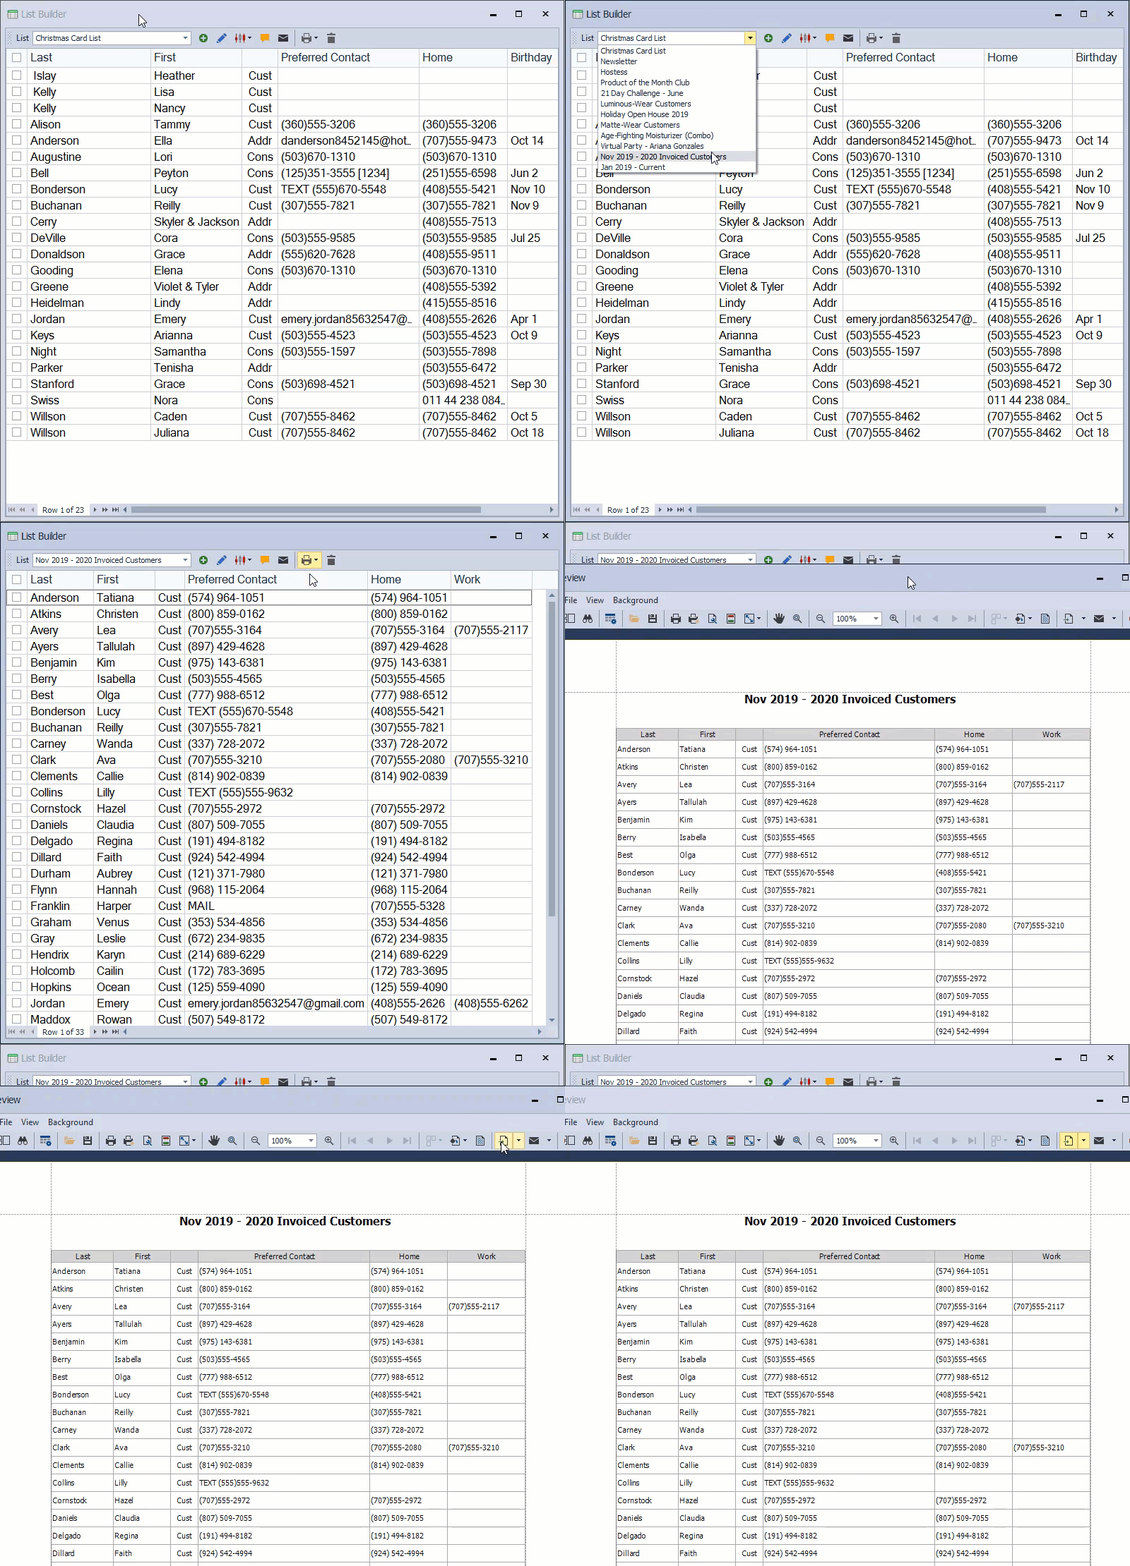
- From the List Builder toolbar, select a group from the List drop-down.
- To add or hide any fields before printing, see Add, Move Or Hide Columns In List Builder.
- To print as a report, from the List Builder toolbar, select
 and choose Print from the drop-down menu.
 - From the preview window, click
 to print (or
  to export as a pdf).
Print Mailing Labels
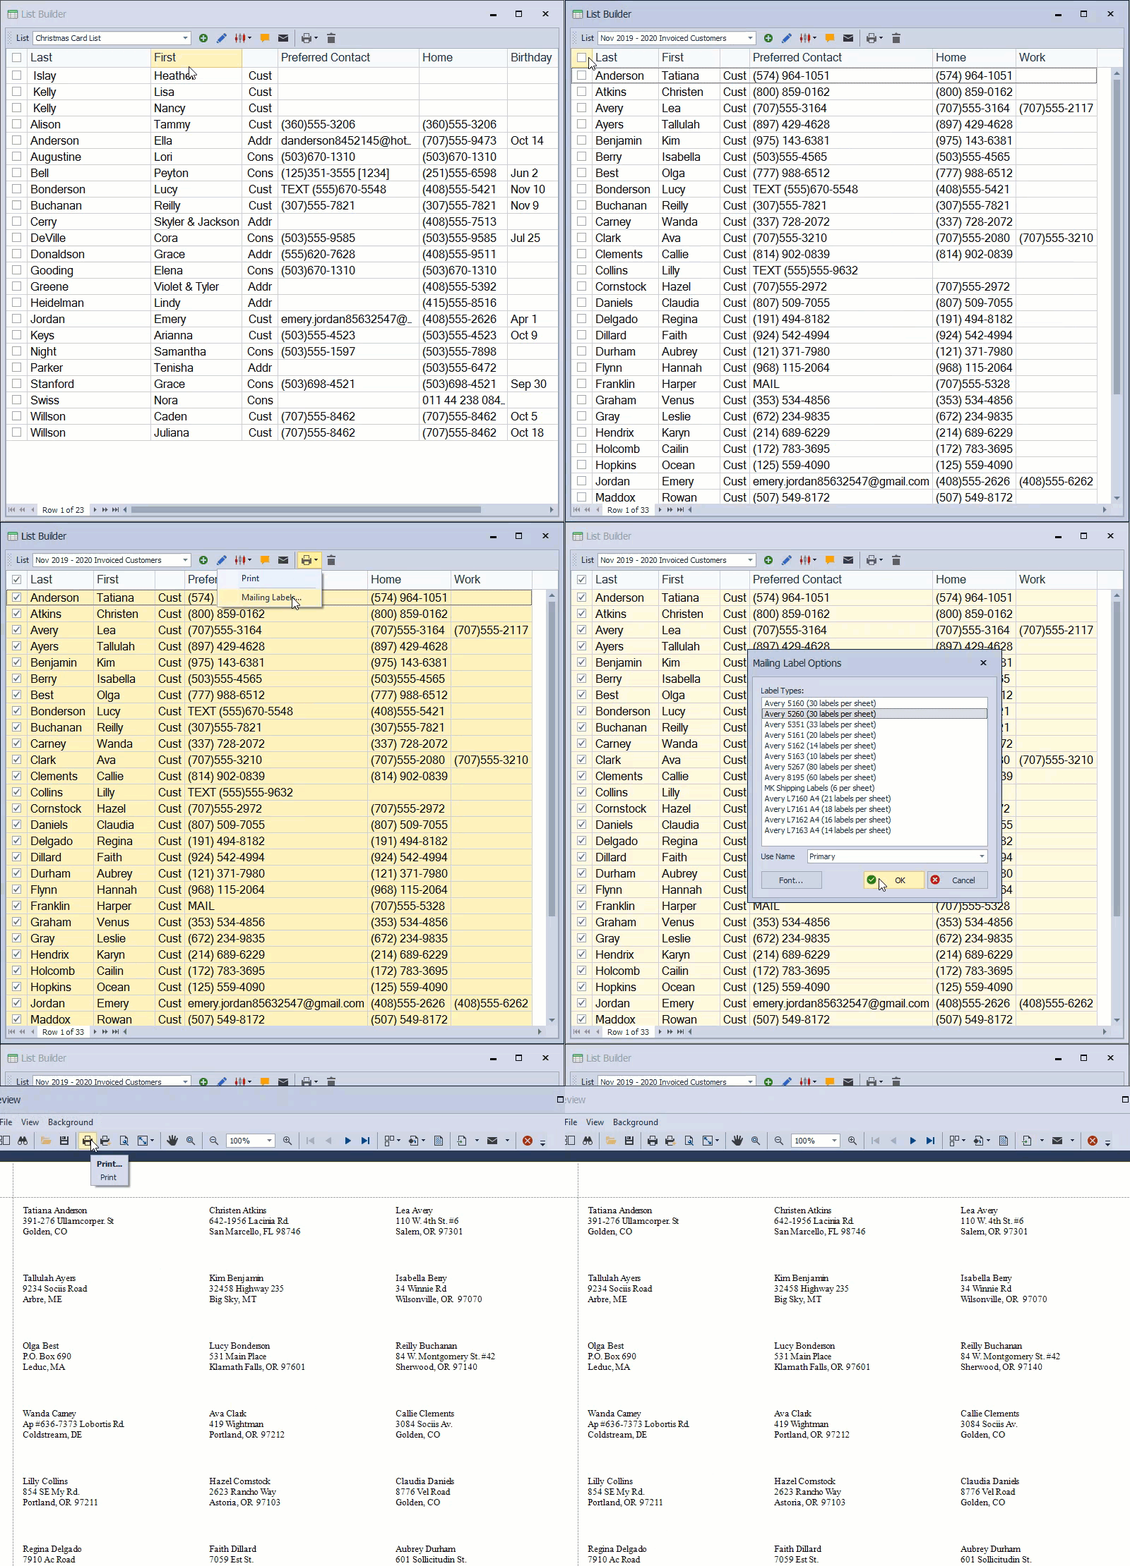
- From the List Builder toolbar, select a group from the List drop-down.
- Select the checkboxes next to the names to include (or select the checkbox column header to select all).
- From the List Builder toolbar, click
 and choose Mailing Labels from the drop-down menu.
 - From the Mailing Label Options form, select the label from the Label Types list (you can also choose between Primary, Spouse, or Family name from the Use Name drop-down list).
- If printing to a partially used sheet of labels, select the number of labels to skip from the top of the sheet.
- Click Font... to change the default font used. Otherwise, select OK to print.
- From the preview window, click
 to print (or
  to export as a pdf or other file format).
Send an Email
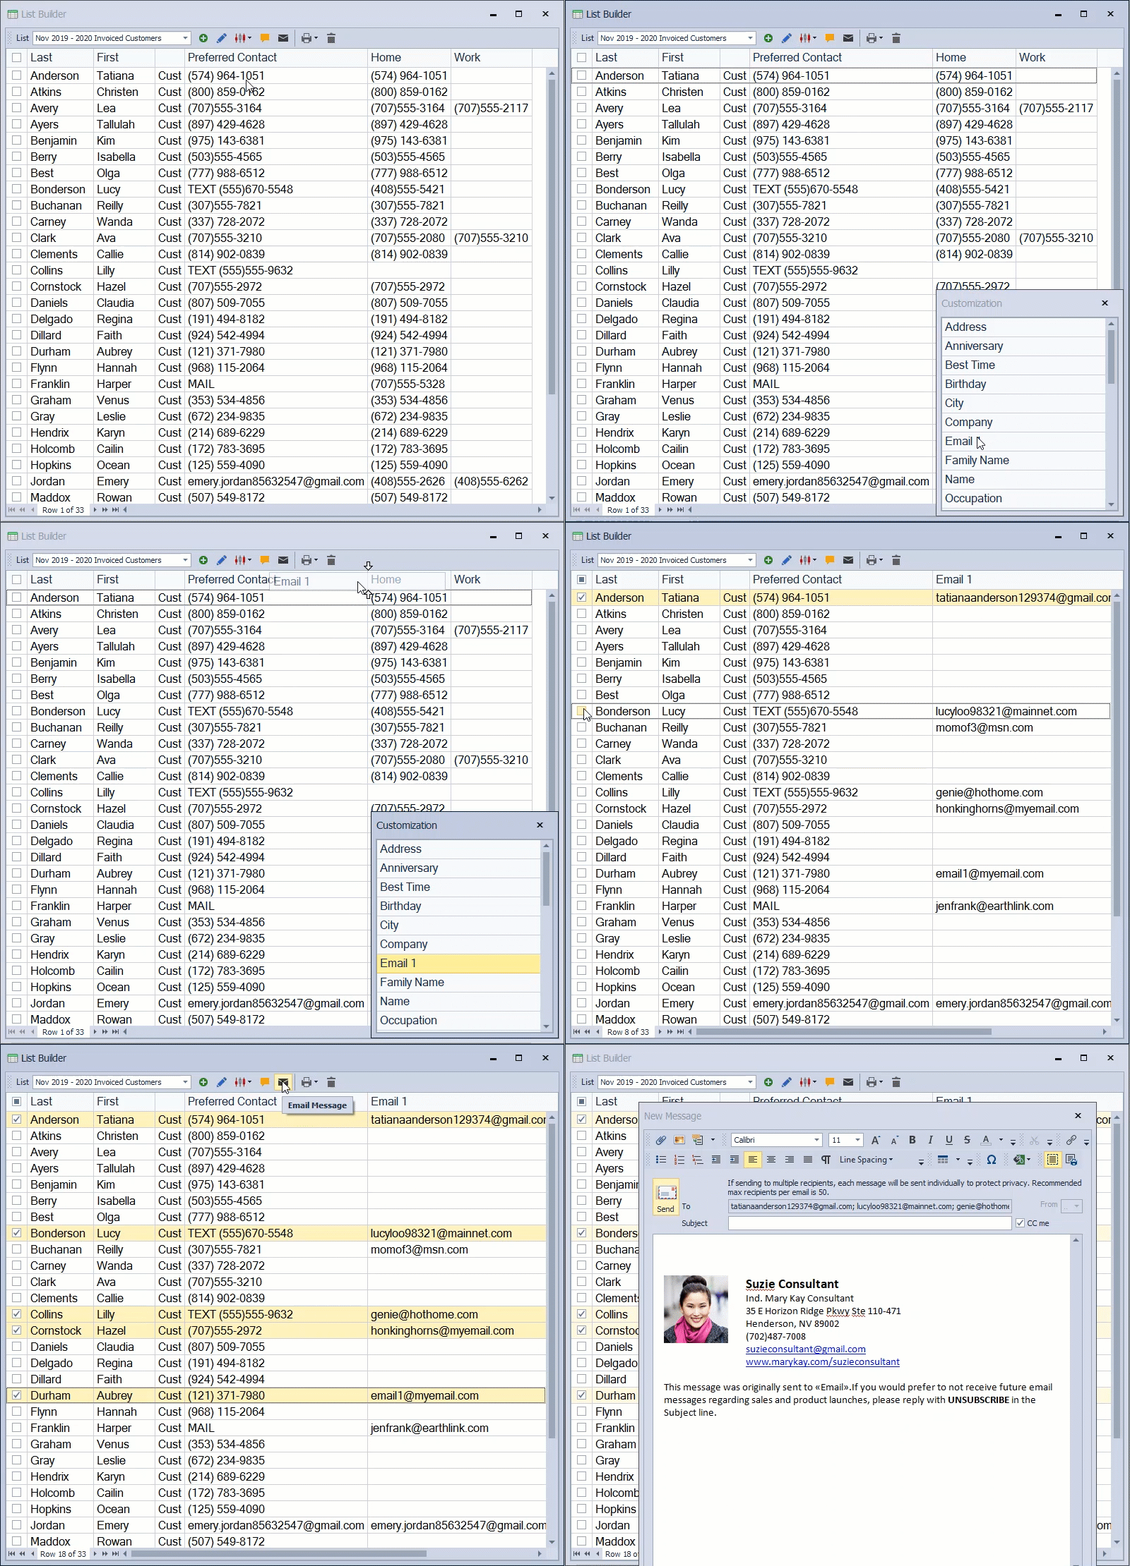
- From the List Builder toolbar, select a group from the List drop-down.
-
Select the checkboxes next to the names to include (or select the checkbox column header to select all).
Tip: See Add, Move Or Hide Columns In List Builder to add the Email 1 column to select only the names that have an email address saved in their profile.
- From the toolbar, click
 to launch the message. See Send a Personalized Group Email (Option 1) for more information on adding fields from their profile, such as their first name.
 - After composing the email, click
 .
.
Create a Contact Log Entry
Individual entries can be made by selecting one checkbox; selecting multiple checkboxes creates identical entries for multiple contacts.
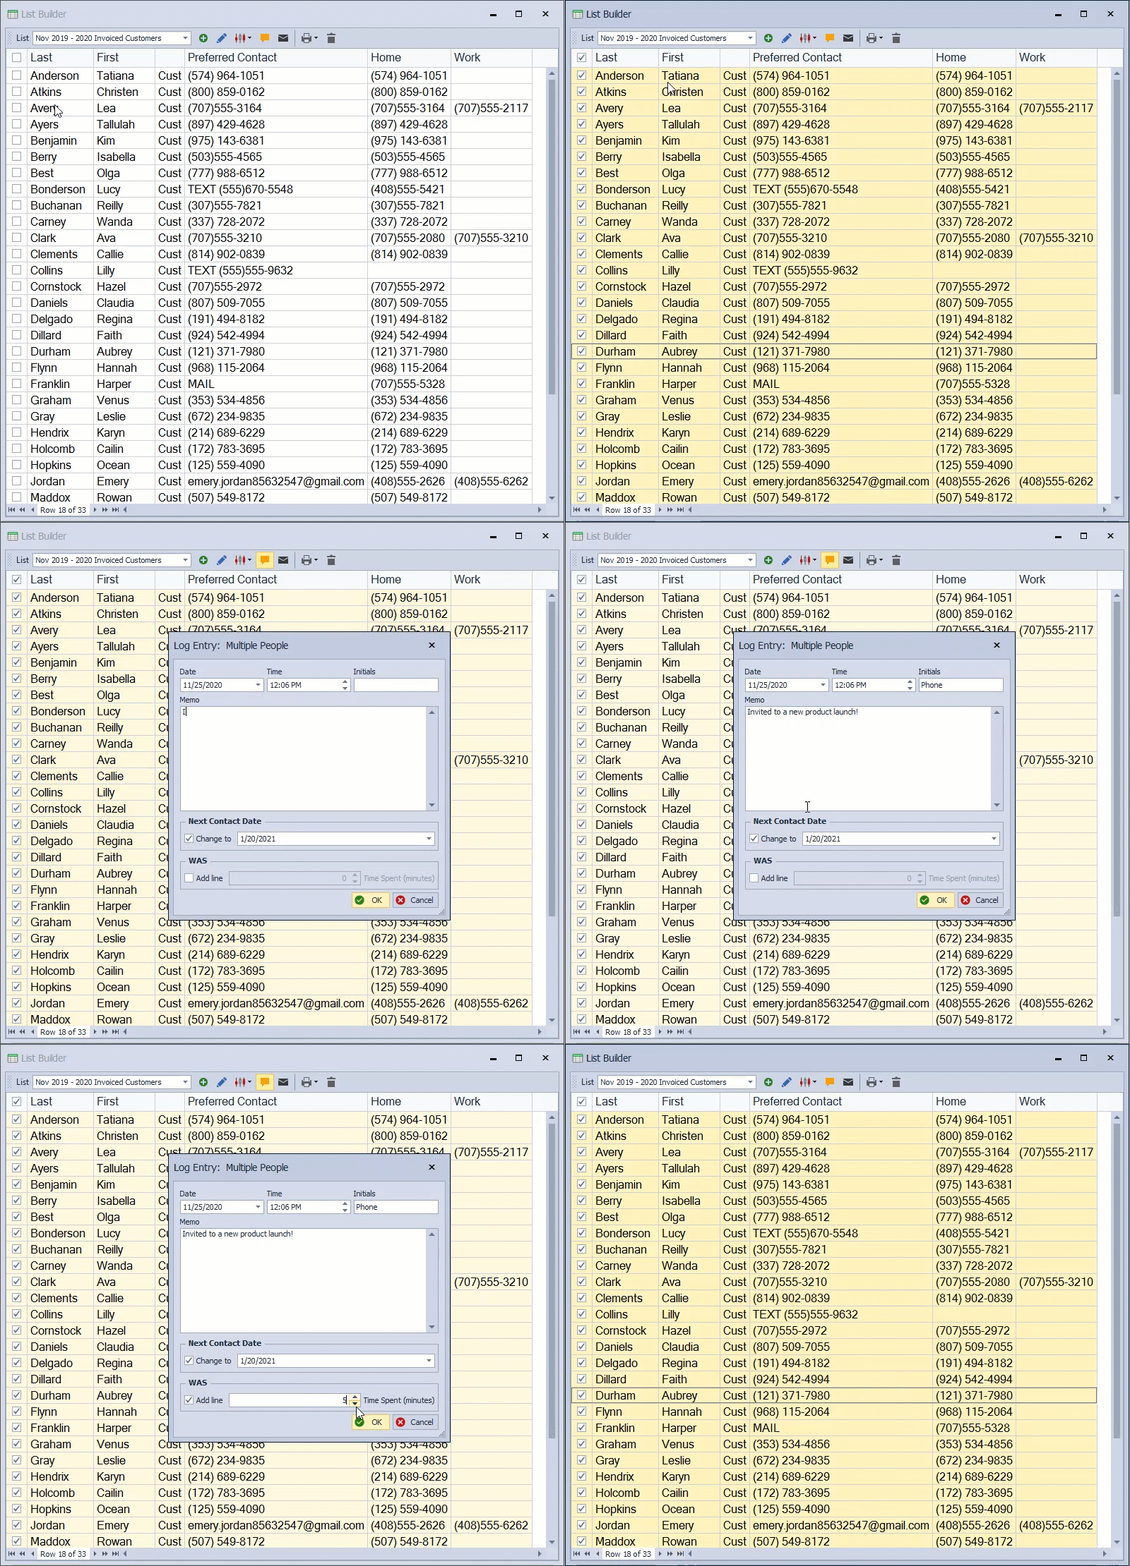
- From the List Builder toolbar, select a group from the List drop-down.
- Select one or more checkboxes (or the checkbox column header to select all and create an identical entry for multiple contacts).
- From the List Builder toolbar, click
 .
. - You can customize the note any way you'd like. For example, instead of putting your initials, you could put the word Call, Postcard, Text, or another form of grouping in the Initials field.
- Choose whether to move their Next Contact Date further in the future by clicking the Change to checkbox and selecting a future date from the date picker. (You'll want to use this option if you're sending an email and would like to follow up with a phone call.)
- Under WAS, select the Add line checkbox and enter the amount of Time Spent (in minutes).
- Click OK to save and close the form.
To view all entries made within a date range, see View Entries From The Contact Log.


