Product collections allow a single product to be created that bundles fixed items with customer‑selected components, such as shades, colors or formulas. Once the collection is created, it may be invoiced with required and optional items chosen at the time of invoicing. The invoice displays one retail price for the full collection while each included item is still deducted from inventory, supporting customizable sets with accurate tracking.

A Collection is a special grouping of products that contains items that never change and variable items selected at the time of the sale for the individual customer (color, shade, fragrance, etc.).
When adding the product collection to an invoice, you will be prompted to select the variable products for that particular customer. The chosen products will then be automatically subtracted from inventory when purchased.
When a collection is purchased, the printed invoice will display the individual items from the collection, but only the total retail amount charged for the collection, not the cost of each item. You will then have the option to add any extra charges for packaging and other included items.
Steps:
Create a Product Collection
Note: Before creating the collection, ensure you have created product profiles for all items you'd like to track and/or display within the product bundle.
From the main toolbar, select  Inventory (or from the Product menu, select Product List).
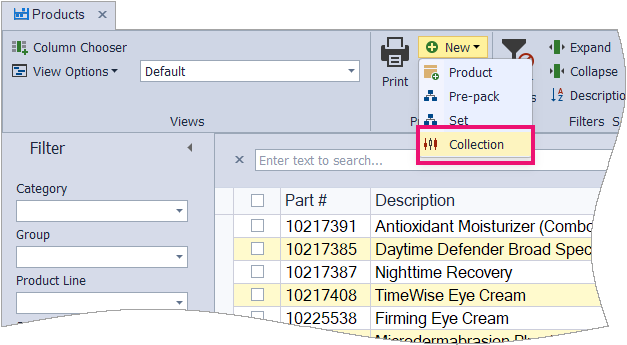
- From the product list toolbar, click
 New, then select
  Collection from the drop-down list.
 - In the Product Itemize form, click
 Lookup to add all products that make up the collection that do not change (compacts, brushes, etc.). For each variable item that is decided at the time of the sale, click Group Lookup to add a group.
-
In the Qty field, enter the quantity of each item contained in the collection.
Tip: If you want the collection to contain more than one of the same type of product, enter the group name on more than one line. For example, if the collection includes three different eye colors, enter three line items with the group name Eye Color.
- When finished adding items to the collection, click OK to save and close the Product Itemize form.
- Assign the collection a part number and give it a description. For example, to create a filled Petite Palette, enter PETITE for the part number and Filled Petite Palette for the description.
- From the Category list drop-down, choose the category where you want the collection located.
- Under the Pricing section, enter the amount you will charge in the Retail/Cost field (or leave blank if you will be entering a custom price each time you add it to an invoice).
- If applicable, select the Taxable* checkbox, then click
 Save to save the newly created collection.

* For the Canadian version of Boulevard, click Settings, then select Advanced Settings to select the taxable settings.
Invoice a Product Collection
- Begin by creating a new invoice.
- Using the Part #, Description, or Lookup options, add a product collection.
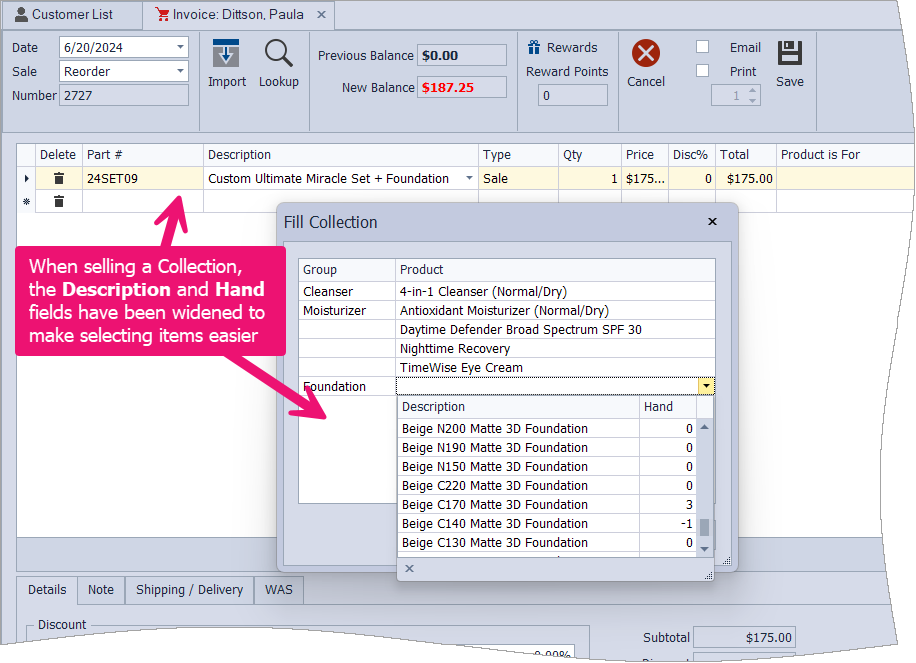
- Using your keyboard, press the Tab key (or arrow down) to display the Fill Collection pop-up.
- Select from the available items assigned to the Group for the collection being invoiced (as shown in the sample image above).
- When finished, click OK.
Note: When the invoice is printed, the itemized selections chosen will be visible; however, only the Price for the entire collection will be displayed to the customer. To view or make changes to the contents of a collection, right-click on the collection and select Edit Contents.
Additional Information:
- To view or print the contents of a bundle, from the product profile toolbar, click
 Itemize.
 - Create a Product Prepack
- Create a Product Set