Setting up Checklists
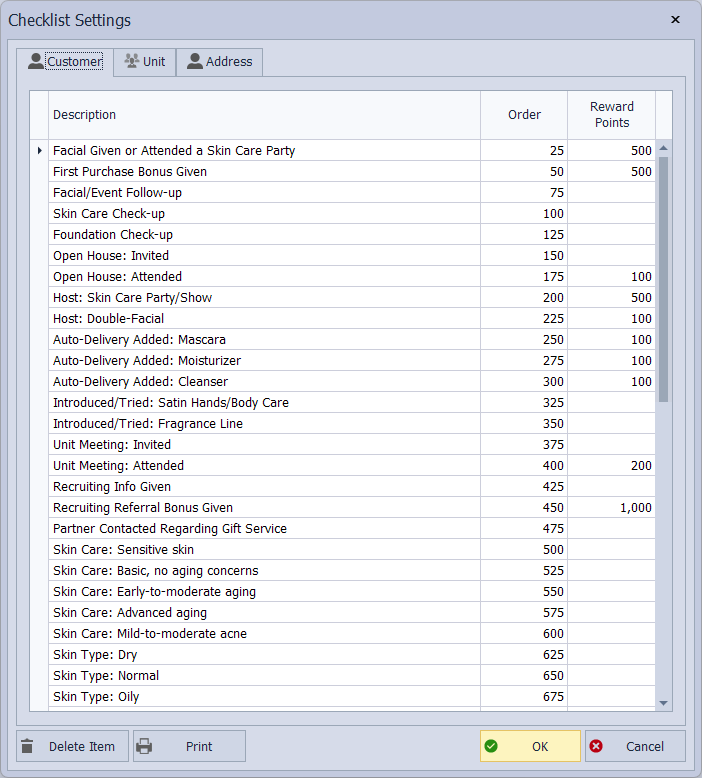
Create a separate checklist of tasks for the customer, address, and unit list. Once you have defined the tasks and specified the order in which you want them to appear, the items will appear in the Checklist tab of each profile. The list can then be managed individually for each contact.
- From the main toolbar, select
 Options, then under the Settings section, select
  Checklist (or from the Edit menu, select Settings, then Checklist.
 - Select either the Customer, Unit, or Address tab.
- Type a task description in the Description field.
- In the Order field, enter a number corresponding to the order of the task in the list.
A suggestion for ordering is to use 25 for the first item, 50 for the second, etc. This numbering allows you to insert numbers in between without having to renumber the entire list. See BoulevardChecklistSamples.pdf attachment for examples. - If you track Reward points and if applicable to the task, enter a point value in the Rewards Points field.
- Continue adding tasks as needed. When finished, click
 OK to accept and close the form.
After setting up the checklist, each profile will contain the items that have been added from above. You can then Print a contact's checklist from the profile toolbar.
Note: If you need to insert a new item, scroll to the bottom of the list and type the item. Enter an order number that corresponds to where it should fall in the list. As long as the order number falls between the items directly before and after it, the new item appears in the list in the desired place.
