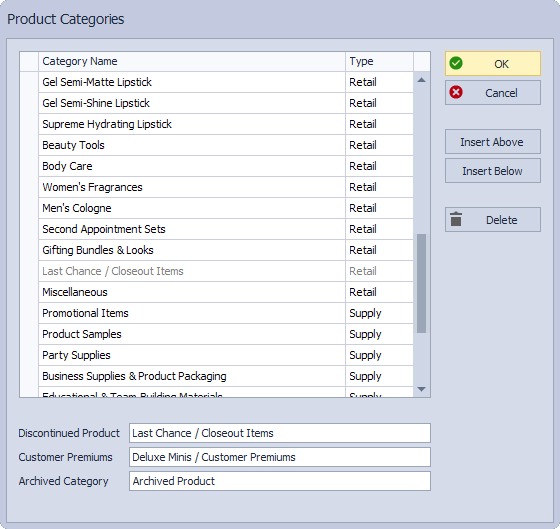
A custom product category can be created from the Product List by opening the Categories screen, inserting a new row, and giving it a name. Each category must be designated as either Retail (for items intended for resale) or Supply (for non‑retail business supplies). Certain system categories—such as Discontinued Product, Archived Product, and Customer Premiums—have fixed types, but their names can still be edited.
From the main toolbar, select  Inventory (or from the Product menu, select Product List).
- From the product list toolbar, click
 Groups, then select Categories.
- Select a row, then click either Insert Above or Insert Below to insert the new category row.
- Change the default category name from New Category to the desired name.
- In the Type column, select Retail if the category will mainly contain retail products intended for resale, or Supply if the category will contain non-retail, business supplies that are not intended for resale.
- Repeat steps 2 - 4 to create additional categories.
- Click OK to save and close the form.
Note: Discontinued Product and Archived Product are Retail category types, and Customer Premiums is a Supply category type, which cannot be changed. You can, however, change the category name from the fields at the bottom of the form.
Additional Information:
- See Move Multiple Products at One Time to add products to the newly created category.
- To move a single item to a different category, open the product profile and select from the available options in the Category drop-down. View